

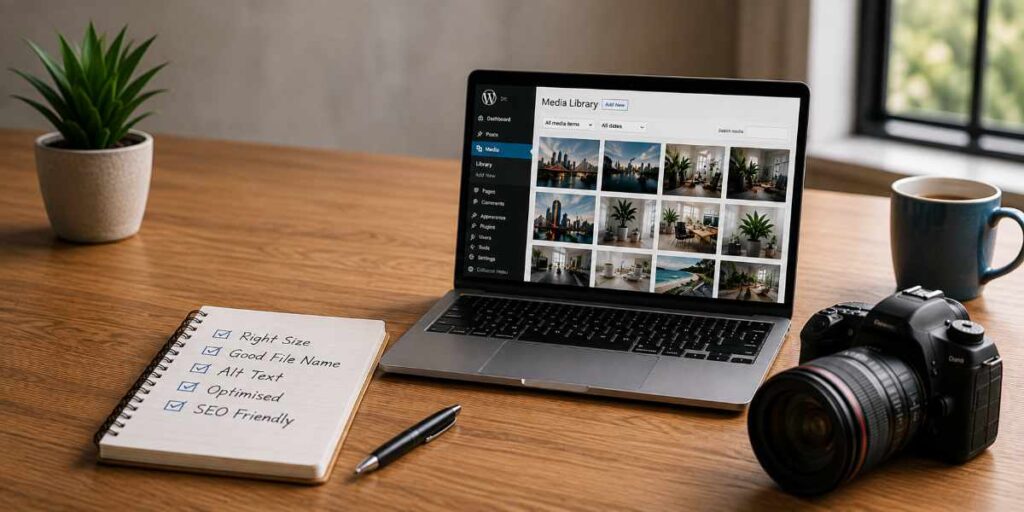
Images are an important part of almost every business website. They help explain products and services, showcase your work, introduce your team and make pages more engaging.
However, images can also cause problems.
Uploading photographs straight from a phone or camera, using inconsistent dimensions, ignoring file names and leaving alt text blank can result in a website that is slower, less accessible and harder for search engines to understand.
The good news is that image optimisation does not need to be complicated.
A few consistent practices can make a significant difference to the appearance, performance, accessibility and SEO of a WordPress website.
Why Image Best Practices Matter in WordPress
Every image uploaded to WordPress can potentially affect several areas of your website:
- Page speed – unnecessarily large images take longer to download.
- User experience – inconsistent image dimensions can make page layouts look untidy.
- Mobile performance – large images can be particularly noticeable on slower mobile connections.
- SEO – descriptive file names and appropriate image context can help search engines understand your content.
- Accessibility – alternative text can help people using screen readers understand meaningful images.
- Website management – consistent naming makes your WordPress Media Library much easier to manage.
The objective is therefore not simply to make an image look good. It is to prepare and use images appropriately for the web.
1. Use Consistent Image Dimensions — But Check Your WordPress Theme
One of the simplest ways to make a WordPress website look more professional is to establish standard image dimensions and aspect ratios.
However, there is no single set of image dimensions that is correct for every WordPress website.
Your ideal image sizes can depend on:
- Your WordPress theme
- The layout of your website
- The width of your content area
- How featured images are displayed
- Whether images are automatically cropped
- The blocks, plugins or page builder being used
- WooCommerce or other specialist functionality
Many WordPress themes define their own image sizes and aspect ratios for featured images, blog archives, cards, thumbnails, hero areas and other parts of the website.
If your WordPress theme or website designer specifies particular image dimensions, those requirements should take priority over general recommendations.
Common WordPress Image Dimensions
As a general starting point, a business website might use dimensions such as:
| Image Type | General Starting Size |
|---|---|
| Blog featured image | 1200 × 630 px |
| General content image | 1200 × 800 px |
| Square image | 1080 × 1080 px |
| Team/profile photograph | 800 × 800 px |
| Thumbnail | 600 × 400 px |
| Large banner/hero image | 1920 × 800–1080 px |
These are examples rather than WordPress standards.
Before adopting them, check whether your theme recommends particular dimensions.
Consistent Aspect Ratios Are Important
In many cases, consistency is more important than the exact number of pixels.
For example, if your WordPress theme has been designed to display blog featured images at 1200 × 630 pixels, preparing all featured images at that size or the same aspect ratio will help maintain a consistent appearance.
If one featured image is landscape, another is square and another is portrait, WordPress may need to crop them to fit the theme layout. This can produce inconsistent results or cut important parts out of an image.
Two images can also have different pixel dimensions while maintaining the same shape.
For example:
- 1200 × 800
- 900 × 600
- 600 × 400
All have the same 3:2 aspect ratio.
Keeping a consistent aspect ratio helps maintain a uniform layout across blog archives, category pages, cards, related posts and other repeated website elements.
Check How Your Theme Crops Images
Some WordPress themes automatically create and crop additional versions of an image when you upload it.
This is particularly important for photographs containing:
- Faces
- Products
- Text
- Buildings
- Logos
- Important details close to the edge of the image
An image might look perfect when viewed by itself but lose an important part of the photograph when displayed as a featured image or archive thumbnail.
After establishing your website image standards, test them across both desktop and mobile layouts.
Once you know what works with your theme, document those dimensions and use them consistently for future images.
Download Our WordPress Image Best Practice Cheat Sheet
Want a quick reference rather than remembering all of this?
Download our free WordPress Image Best Practice Cheat Sheet for recommended starting dimensions, file-size guidelines, image formats, filename examples, alt-text guidance and a pre-upload checklist.
2. Do Not Upload Huge Camera or Phone Images
Modern phones and digital cameras can produce extremely large photographs.
A photo might be 4000 or 5000 pixels wide and several megabytes in size.
If the largest the image will ever appear on your website is approximately 1200 pixels wide, uploading the full-resolution original usually provides little benefit.
Instead, resize the image before or during the optimisation process.
For normal website content, an image around 1200–1600 pixels wide will often be sufficient. Large full-width hero images may require larger dimensions depending on your theme and website design.
The principle is simple:
Do not serve a 5000-pixel image when the visitor’s browser only needs to display it at 1000 pixels.
WordPress can generate multiple image sizes from an uploaded image, but starting with a sensibly sized and optimised original is still good practice.
3. Pay Attention to Image File Size
Pixel dimensions and file size are not the same thing.
An image might be 1200 × 800 pixels but still have an unnecessarily large file size because it has not been compressed efficiently.
As a general working guideline, you might aim for:
- Small images and thumbnails: under 100 KB where practical
- Standard content images: approximately 100–250 KB
- Large or detailed images: preferably below 300–500 KB
- Large hero images: optimise as aggressively as practical without noticeably reducing quality
These should not be treated as rigid limits.
A detailed photograph may need more data than a simple graphic. The objective is to achieve the smallest practical file size while maintaining acceptable visual quality.
A 350 KB image that looks excellent can be preferable to a 100 KB version covered in obvious compression artefacts.
4. Use Modern Image Formats
For most WordPress websites, WebP is an excellent format for photographs and general website graphics because it can provide good image quality at relatively small file sizes.
Depending on your website and hosting environment, AVIF may also be an option and can provide excellent compression.
Traditional formats still have their place.
JPEG/JPG
Suitable for photographs, particularly where WebP or AVIF is not being used.
PNG
Useful where transparency or very crisp graphical elements are required. PNG files can become extremely large when used for photographs.
WebP
A strong general-purpose choice for modern websites, offering efficient compression and support for transparency.
SVG
Excellent for logos, icons and simple vector graphics because SVG images can remain sharp at different sizes.
SVG files need to be handled carefully in WordPress because SVG is more than a simple bitmap image format and insecure SVG files can introduce security risks. If you allow SVG uploads, make sure they are handled appropriately by your WordPress setup.
For many business websites, a combination of WebP for photographs and SVG for suitable logos and icons can work particularly well.
5. Rename Images Before Uploading Them to WordPress
Image filenames are frequently overlooked.
A photograph straight from a camera might have a name such as:
IMG_8472.jpg
A stock image might arrive as:
shutterstock_2485179234.jpg
Neither tells you very much about the image.
Rename files before uploading them.
For example:
brisbane-electrician-switchboard-upgrade.webp
is considerably more useful than:
IMG_8472.webp
A Good Image Naming Convention
Use:
- Lowercase letters
- Descriptive words
- Hyphens between words
- Short but meaningful descriptions
Avoid:
- Spaces
- Random numbers
- Extremely long filenames
- Keyword stuffing
- Names such as
final-image-new-2.webp
A useful formula is:
subject-location-or-context-description.webp
For example:
roof-restoration-brisbane-bayside.webp
or:
small-business-website-design-brisbane.webp
The filename should describe the actual image rather than simply being a collection of SEO keywords.
Good filenames also make your own WordPress Media Library considerably easier to manage.
6. Add Appropriate Alt Text
Alternative text, usually called alt text, describes meaningful images when the image cannot be seen.
It is particularly important for accessibility because screen readers can use alt text to communicate the purpose or content of an image.
For example, instead of:
business
a more useful alt description might be:
Electrician installing a residential switchboard in Brisbane
The goal is to describe the image naturally and in a way that makes sense within the page.
Do Not Stuff Keywords Into Alt Text
Avoid alt text such as:
Brisbane electrician best electrician Brisbane electrical services electrician near me
That is not useful to someone using a screen reader and is not a sensible SEO strategy.
Write for people first.
If the page topic and image genuinely relate to your target search phrase, relevant words will often appear naturally.
Not Every Image Needs Descriptive Alt Text
Decorative images that add no meaningful information generally do not need descriptive alternative text.
For example, a decorative background pattern does not need a lengthy explanation.
This is an important distinction: alt text exists primarily to communicate the purpose or meaning of an image, not simply to provide another place to insert SEO keywords.
7. Understand the Difference Between Alt Text, Title and Caption
WordPress provides several fields when you upload an image, and they serve different purposes.
Alt Text
Describes the meaning or purpose of an image and is important for accessibility.
Title
WordPress normally creates an attachment title based on the filename. This can be changed to something more readable, but it should not be confused with alt text.
Caption
A caption is visible text displayed with an image when your theme or block is configured to show it.
Captions are useful when additional information, attribution or explanation will help the reader.
Description
WordPress also provides an image description field.
For most ordinary business websites, this field is considerably less important than using an appropriate filename, alt text and caption where required.
8. Crop Images Before Uploading Where Possible
Relying entirely on WordPress to make every image fit can produce unpredictable results.
If you know your theme expects a particular featured-image size or ratio, prepare the image accordingly before uploading.
This allows you to control the crop rather than leaving the important parts of an image to automatic cropping.
This is particularly important for photographs containing:
- Faces
- Products
- Text
- Buildings
- Logos
- Important details near the edges
Always check how important images display in the actual theme after uploading them.
9. Be Careful About Putting Text Inside Images
Adding headings and promotional text directly to an image can look attractive, but it can create problems.
Text embedded in an image:
- Cannot normally be read by screen readers as ordinary page text
- Does not resize as effectively as HTML text
- Can become difficult to read on mobile devices
- Is harder to update
- May be cropped when WordPress uses the image at different dimensions
Where possible, keep important headings, calls to action and information as actual website text positioned around or over the image by your website design.
If an image contains important text, make sure the same essential information is also available elsewhere on the page.
10. Let WordPress Use Responsive Images
WordPress can automatically generate several versions of uploaded images.
It can then provide responsive image information that helps a visitor’s browser choose an appropriately sized version.
For example, someone viewing your website on a small phone may not need to download the same large image required for a wide desktop screen.
This is one reason it is generally better to insert images using normal WordPress image blocks, featured-image functions and theme functionality rather than manually hard-coding image URLs into page layouts.
11. Consider Image Lazy Loading
Lazy loading delays loading certain images until they are needed.
Instead of downloading every image on a long page immediately, the browser can load images as the visitor approaches them.
This can improve initial page performance.
However, images that are immediately visible at the top of a page need special consideration.
Your main hero or prominent above-the-fold image should not automatically be treated in exactly the same way as an image near the bottom of a long article.
Poor image loading configuration can affect website performance and metrics such as Largest Contentful Paint (LCP).
12. Do Not Automatically Use the Same Image for Every Platform
Your website, Facebook, Instagram, LinkedIn and Google Business Profile can all display and crop images differently.
Trying to use one image file for everything can result in awkward cropping.
Instead, create different versions where necessary.
For example:
Website featured image:
1200 × 630 px, or the dimensions specified by your theme
Square social image:
1080 × 1080 px
This gives you greater control over cropping, composition and any text included in social graphics.
Think of the website image as a master content asset, with separate social versions created when required.
13. Keep Your WordPress Media Library Organised
A WordPress website that has been running for several years can contain hundreds or thousands of images.
Good naming practices make a significant difference.
Compare a Media Library containing files named:
IMG3827.jpgIMG3828.jpgimage-final2.pngnew-image-3.jpg
with one containing:
brisbane-office-cleaning-team.webpcommercial-cleaning-brisbane.webpoffice-cleaning-before-after.webp
The second approach makes future website maintenance considerably easier.
Before uploading an image, ask:
If I look for this image two years from now, will its filename help me identify it?
14. Do Not Upload Duplicate Images Unnecessarily
It is common for website editors to upload the same logo, staff photograph or stock image multiple times because they cannot find the original in the Media Library.
This creates clutter and consumes unnecessary storage.
Search the Media Library before uploading another copy.
Consistent filenames make this much easier.
15. Remove Unused Images Carefully
Unused images can accumulate over time, particularly after redesigning a website.
Cleaning the Media Library can reduce clutter and storage usage, but automated media-cleaning tools should be used cautiously.
An image may appear unused while actually being referenced by:
- Theme settings
- Custom fields
- Page builders
- CSS
- Plugins
- Structured data
- Reusable blocks or patterns
Always create a full website backup before performing a large Media Library clean-up.
16. Remember Copyright and Image Licensing
Finding an image through Google Images does not automatically mean you have permission to use it.
Use:
- Your own photographs
- Images supplied by the business with appropriate rights
- Properly licensed stock photography
- Images supplied under licences that permit your intended use
- Appropriately generated original visual assets where suitable
Keep records of licences for purchased stock photography.
This becomes particularly important for businesses managing larger websites with multiple authors or contributors.
A Simple WordPress Image Workflow
A consistent workflow makes image optimisation much easier.
Before uploading an image to WordPress:
- Check whether your theme specifies an image size or aspect ratio.
- Choose an image relevant to the page or article.
- Crop it to the correct aspect ratio.
- Resize it to sensible pixel dimensions.
- Optimise or compress it.
- Convert it to an appropriate format such as WebP where suitable.
- Give it a descriptive, lowercase filename using hyphens.
- Upload it to WordPress.
- Add meaningful alt text when the image requires it.
- Add a caption if additional visible context is useful.
- Check how the image appears on desktop and mobile.
Following the same process every time can prevent many of the image problems that accumulate on older WordPress websites.
WordPress Image Best Practice Checklist
Before publishing a page or post, check:
- Image dimensions match the requirements of your WordPress theme or website design.
- Images serving the same purpose use consistent dimensions or aspect ratios.
- Images are not significantly larger than required.
- File sizes have been optimised.
- Modern image formats are being used where appropriate.
- Filenames describe the actual image.
- Filenames use lowercase letters and hyphens.
- Meaningful images have appropriate alt text.
- Decorative images are treated appropriately for accessibility.
- Important text is not available only inside an image.
- Images display correctly on mobile.
- Featured images crop correctly on archive and category pages.
- Images are properly licensed.
- Duplicate uploads have been avoided.
What Is the Best Image Size for WordPress?
There is no single ideal image size for WordPress.
The correct dimensions depend on your WordPress theme, website design and how the image will be displayed.
Your theme may specify particular dimensions or aspect ratios for featured images, thumbnails, hero images, WooCommerce products and other image types. Where theme-specific recommendations exist, use those as your starting point.
For a typical business website, creating standard sizes for featured images, content images, team photographs, thumbnails and hero images is more useful than applying one dimension to every image.
The key is to avoid uploading unnecessarily large images while maintaining consistent dimensions and aspect ratios for images serving the same purpose.
Are WebP Images Better for WordPress?
For many applications, WebP is an excellent choice.
WebP generally provides a good balance between visual quality and file size and is supported by modern WordPress installations and browsers.
However, format is only one part of image optimisation.
A poorly prepared 5000-pixel-wide WebP image can still be unnecessarily large.
Correct dimensions, compression, responsive delivery and appropriate loading behaviour all matter.
Do Image File Names Help SEO?
Descriptive filenames can provide useful context about an image, but they should not be treated as a major ranking trick.
Use filenames that accurately describe the image.
For example:
brisbane-cafe-outdoor-dining.webp
is much more meaningful than:
DSC00482.webp
Good filenames also make managing your own WordPress Media Library considerably easier.
Are Alt Tags Important for SEO?
Alt text can help search engines understand images, but its most important role is accessibility.
Write alt text to communicate the meaning or purpose of an image to someone who cannot see it.
Do not treat alt text as a place to insert a list of target keywords.
Accessibility and SEO best practices frequently work together because both benefit from websites that are clear, structured and useful.
Final Thoughts
Image optimisation is one of those website tasks that seems small until hundreds or thousands of poorly prepared images accumulate.
Establishing a simple image policy from the beginning can prevent many problems.
Start by finding out what image dimensions and aspect ratios your WordPress theme requires. Then use those dimensions consistently.
Resize photographs before uploading them, keep file sizes sensible, use descriptive filenames, add appropriate alt text and choose modern image formats where suitable.
Most importantly, follow the same process every time.
For a small business website, these habits can contribute to a faster, more professional and easier-to-manage WordPress site while also supporting accessibility, user experience and search visibility.
Keep the Checklist Handy
Download our WordPress Image Best Practice Cheat Sheet and keep it as a quick reference whenever you prepare images for your website.